
Sunday, August 30, 2009
Tuesday, August 25, 2009

Week 6 3d class involved putting the lining into the jacket we have been working on and off.
At the beginning, the pattern making seemed rather confusing, but was a piece of cake when Mick actually explained it rather than using the notes he made… that was totally confusing.
Sewing the lining (we did this in calico also so you cant see the contrast in the images) also was rather simple, and I was breezing through until I hit a speed bump and realised I had sewn the pieces back to front (so the all seams are visible when inserting into the jacket, and the whole purpose of lining is to hide the seams!!) never mind the old un picker came to use and quickly I reversed all my seams to what was the right side.
The sleeve was tricky to identify which way it went into the jacket sleeve because it had to be flipped around yet still face the right way.
The other complex part was attaching the lining to the facing at the hem curve as I didn’t prove the pattern, however it didn’t turn out too bad.
The finishing touches were hand stitching the hem which we used a blind hemstitch.
These images are from week 4’s 3d class.
Setting a sleeve into our shawl collar toile. (Toile with all the pockets).
These images indicate how much work is involved within the internal structure. It includes the shoulder pad and shoulder/sleeve roll and the breast/chest plate where we used a piece of pink fused calico to imitate the canvas.
In a structured jacket there will be up to 4 layers or even more, this can be made from a canvas or a haircloth. Like the other studio classes we didn't use the machine to ease the sleeve into the armhole, we did the “proper” “time consuming way” which “probably” gave are “better result” this was done by easing in the sleeve with pins, the pins were placed 1cm on the seam line. (If it was greater than 1cm there was less ease, which is wrong, but it made it easier, this is what I did wrong and at the beginning I thought it was relatively easy. I then had to redo the pins making sure it was spot on 1cm and making sure the notches matched and eased in what was needed. A running stitch was used and here we had to make sure no tucks appeared. It wasn’t too bad after all and I didn’t have any major puckers/tucks.
 Like the other studio classes we didn't use the machine to ease the sleeve into the armhole, we did the “proper” “time consuming way” which “probably” gave are “better result” this was done by easing in the sleeve with pins, the pins were placed 1cm on the seam line. (If it was greater than 1cm there was less ease, which is wrong, but it made it easier, this is what I did wrong and at the beginning I thought it was relatively easy. I then had to redo the pins making sure it was spot on 1cm and making sure the notches matched and eased in what was needed. A running stitch was used and here we had to make sure no tucks appeared. It wasn’t too bad after all and I didn’t have any major puckers/tucks.
On the stand we positioned the shoulder pad into place, trimming the edges of the padding and tacked it into place, then the sleeve/shoulder roll was attached, this was done was by machine and slightly easing the felt in.
The last touches were the herringbone stitch, which was used to secure the shoulder pad in place.
The last touches were the herringbone stitch, which was used to secure the shoulder pad in place.
I have never used a shoulder pad and roll to build up parts of a jacket to make it structural. I really enjoyed doing this exercise, because it was new but the craft that was involved, working with your hands and using hand stitches to secure these components was very interesting.
Tuesdays week 5 lecture that Ricarda took was about “CRAFT”
craft |kraft|
noun
1 an activity involving skill in making things by hand : the craft of bookbinding | pewter craft.
• ( crafts) work or objects made by hand : the shop sells local crafts | [as adj. ] ( craft) a craft fair.
• a skilled activity or profession : the historian's craft.
• skill in carrying out one's work : a player with plenty of craft.
• skill used in deceiving others : her cousin was not her equal in guile and evasive craft.
• the members of a skilled profession.
• ( the Craft) the brotherhood of Freemasons.
2 ( pl. same) a boat or ship : sailing craft.
• an airplane or spaceship.what I consider the connotation of craft is similar to 1. an activity involving skill in making things by hand and that it involves a high level of
patience, it may be time consuming but it is produced by the hand, a natural form of production.
Where as something produced by machine can still give the same result that still may create that wow factor however knowing that its creator
has spent quality time into producing that art form gives it a whole different approach.
This is similar to what I wrote in my conclusion to my technical report. Here is a paragraph from my conclusion.
This is similar to what I wrote in my conclusion to my technical report. Here is a paragraph from my conclusion.
Machines can imitate anything in today’s society but is the quality comparable to that done by traditional hand methods?
If I were to categorise this garment I would say that it is average when being compared to hand tailored jacket like this image, as the amount of hand stitching involved in preparation and attachment of the canvas and other details is time consuming.
Machines can imitate anything in today’s society but is the quality comparable to that done by traditional hand methods?
This of course is what makes hand tailored jackets so expensive. The labour involved is truly monumental.
 Another question that was brought up in the lecture was does craft have to be done to perfection or can it have a raw aspect about it?
no I don’t think craft has to be neat nor does it have to be messy, this depends on the desired outcome.
The aspect of craft that I have been looking at relates back to week 4’s shoulder pad exercise. Building up this structure by using layers of wadding to create weightless bulk and shoulder pads to create height.
Putting forward boundaries and questions that I need to deliberate or even write down answers that could perhaps help me initiate the process into
designing and constructing this so called tailored? Jacket?
In class we put forward suggestions and our thoughts to what we believed a jacket is and what tailoring means.
designing and constructing this so called tailored? Jacket?
In class we put forward suggestions and our thoughts to what we believed a jacket is and what tailoring means.
In a response to Mick's comment what constitutes a jacket and what constitutes tailoring I’m still trying to jot down what I think these both mean.
There is no right or wrong answer as one can make the jacket in any form of silhouette and a variety of construction methods.
Begining with why do we wear jackets?
It is like a 2nd skin, protects us from the outside surroundings.
Made for warmth to insulate the wearer from the cold. Or perhaps its function is to act similarly like a towel, worn to soak up sweat and to hide the
dirty sweat patches? Again this poses the question of does a jacket need sleeves? Can it be sleeveless or have short sleeves like a t-shirt?
Placing my 'jacket' in a context by designing it for a specific function is what I keep reminding myself, again keeping in mind of having a 'theme & audience',
which we can choose from the outcome or throughout the process.
At the begining of the semester I was looking at designing a tailored jacket for either a sport or an activity that one does not wear a tailored jacket normally.
I was looking at sports that I have an interest in such as, gymnastics, skiing/snowboarding, rowing, or leisure activities including rollerblading etc. Taking these functions that are needed for the person to participate in that activity will have to be present in the jacket. Some elements that will be
functional and other parts that may look functional but are not. The tension between function and just for looks, the tensions between movements yet comfort.
But through research I think I have steered away from this (maybe not maybe it will come back into my brain)
but what I have been looking at, still the sporting side because like all , the concept of movement is important in designing a jacket, I was looking at
sports like fencing where the jacket offers protection from the outside world , its opponent.
From here I was looking at “PROTECTION” yes the jacket acts as a shell a form of protection, What I am noticing is that they are armor like.
Layers like shield over shield, the padding involved to build up this layering is done with wadding that creates this 3d aspect.


Perhaps I am going to look into the tensions between sharp bold 3d elements compared to soft layers that can protect that wearer.
Besides armor like images I have taken the concept of how animals act against their predators. For instance the lizard
“If the lizard is threatened by a predator, it ruffles out his "mane" to make himself look tough
-The ruff folds neatly at the lizards neck.
-When it opens, it opens into a series of pleats.
-The pattern on the ruff blends in with the surroundings.
-When the lizard is startled it spreads ruff, opens mouth wide, hisses, and flicks tail from side to side.”
http://library.thinkquest.org/5053/Australia/australianfrilledlizard.html viewed 20-8-09
“Many lizards can detach their tails in order to escape from predators, an act called autotomy, but this trait is not universal. Vision, including color vision, is particularly well developed in most lizards, and most communicate with body language orbright colors on their bodies as well as with pheromones.”http://en.wikipedia.org/wiki/Lizard viewed 20-8-09.
Again taking into the consideration of Technical and creative, and the components that make a jacket functional which are related to this theme of protection.I have some ideas of having pockets that are visible from the exterior however there are layers within that can be taken out in soft folds.creating bold and padded should pads that depict authority and using the neckline to demonstrate how one can protect itself through the use of big and
bold collars that extend out like a mane or enclose parts of the face. Hindering the body from its prey. or does the body have to be enclosed?These are just ideas that spring to mind, the paper of my folio awaits the images that will be sucked from my brain and expressed onto the white paper,hopefully my drawings will express what I try tell you in words, (because i cant draw) and eventually be viewed on the blog. Only with time my friends…..

After our first 2d class I thought my jacket wasn’t really detailed enough.
The jacket I started off with was this double-breasted jacket that was my uncles however I thought I didn’t really
want to ruin it and it would come in handy in the near future.
Double breasted jacket (from this jacket I have kind of been inspired by double-breasted aspect. I like how it looks on the body) So I stuck with my second option of another random jacket I found in my grandma’s garage. I think there is slightly a little more details to pockets and vents, clearly I don’t know If there is more detail in this jacket compared to my uncles double breasted one because I was not keen to pull it apart, but I’m working with what I have. I have discovered that this jacket is cheap, there is no hand stitching now taking the lining off and getting a better understanding of how many layers that are actually involved to constructing this one garment. However it is evident that there is still a fair bit of work involved for how cheap it would be (I’m comparing it to a tailored bespoke jacket that would consist of traditional techniques and methods. it is actually fascinating how machines these days can mimic techniques such as hand stitching etc. they even have tacking machines, how hard is it to tack? There is a stitch that even Mick doesn’t know what it is. Haha I did try to do a little investigation into the brand “Mac Arthur” Brisbane but failed. Must just be a little tailors shop in Brisbane.
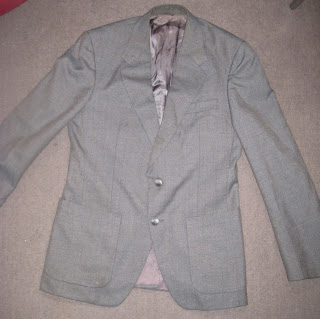
This week (week 3) we looked into pockets, the welt pocket and the jet pocket. Pockets are so important in garments today; they are one of the most practical functions that hold our important items, which replaces things like purses and bags. I like the look of the jet pocket because it looks kind of different to a normal patch pocket. To sew it wasn’t that hard but to get it to perfection it was, but it was harder compared to the welt pocket and I have to admit the jet pocket took twice as long. (Maybe because we were just cruising through it that took pretty much the whole morning, and by the time we did the welt we just wanted to go home) The one thing I did not get perfect was when we had to push the snipped triangles and sewing to just catch the corner.
welt

 jet
jet 
 Our homework was to make a variation sample of the jet pocket, emmie’s L shaped jet or the patch pocket (sewn internally therefore you cant see any stitching on the exterior)
I chose to do the patch pocket, yes it is not as creative as making your own variation, however I wanted to find out how to do it as my technical report involves investigating this technique anyway.
the thing that is different to a normal patch pocket and this method is that the seam/stitching is not visible from the outside like a normal patch pocket is sewn from the outside where it has topstitching around it.
this example is sewn from the inside which is a bit trickier because your having to keep the pocket aligned up with a template marked onto the jacket and it can get rather bulky as your trying to sew around the corners.
here are the first steps involved the pieces has a self facing which is turned back (this is called a bearer i think or maybe thats on the pocket bag) therefore no seams are seen here.

the next step is attaching the pocket piece to the jacket (here done on a sample fabric) the template acts like a guide where you postion the pocket ontop. (i dont have a photo of sewing this step sorry)

final product of the tailored patch pocket (seams internal)

The jacket I started off with was this double-breasted jacket that was my uncles however I thought I didn’t really
want to ruin it and it would come in handy in the near future.
Double breasted jacket (from this jacket I have kind of been inspired by double-breasted aspect. I like how it looks on the body)
 So I stuck with my second option of another random jacket I found in my grandma’s garage. I think there is slightly a little more details to pockets and vents, clearly I don’t know If there is more detail in this jacket compared to my uncles double breasted one because I was not keen to pull it apart, but I’m working with what I have. I have discovered that this jacket is cheap, there is no hand stitching now taking the lining off and getting a better understanding of how many layers that are actually involved to constructing this one garment. However it is evident that there is still a fair bit of work involved for how cheap it would be (I’m comparing it to a tailored bespoke jacket that would consist of traditional techniques and methods. it is actually fascinating how machines these days can mimic techniques such as hand stitching etc. they even have tacking machines, how hard is it to tack? There is a stitch that even Mick doesn’t know what it is. Haha I did try to do a little investigation into the brand “Mac Arthur” Brisbane but failed. Must just be a little tailors shop in Brisbane.
 This week (week 3) we looked into pockets, the welt pocket and the jet pocket. Pockets are so important in garments today; they are one of the most practical functions that hold our important items, which replaces things like purses and bags. I like the look of the jet pocket because it looks kind of different to a normal patch pocket. To sew it wasn’t that hard but to get it to perfection it was, but it was harder compared to the welt pocket and I have to admit the jet pocket took twice as long. (Maybe because we were just cruising through it that took pretty much the whole morning, and by the time we did the welt we just wanted to go home) The one thing I did not get perfect was when we had to push the snipped triangles and sewing to just catch the corner.
welt

 jet
jet 
 Our homework was to make a variation sample of the jet pocket, emmie’s L shaped jet or the patch pocket (sewn internally therefore you cant see any stitching on the exterior)
I chose to do the patch pocket, yes it is not as creative as making your own variation, however I wanted to find out how to do it as my technical report involves investigating this technique anyway.
the thing that is different to a normal patch pocket and this method is that the seam/stitching is not visible from the outside like a normal patch pocket is sewn from the outside where it has topstitching around it.
this example is sewn from the inside which is a bit trickier because your having to keep the pocket aligned up with a template marked onto the jacket and it can get rather bulky as your trying to sew around the corners.
here are the first steps involved the pieces has a self facing which is turned back (this is called a bearer i think or maybe thats on the pocket bag) therefore no seams are seen here.


the next step is attaching the pocket piece to the jacket (here done on a sample fabric) the template acts like a guide where you postion the pocket ontop. (i dont have a photo of sewing this step sorry)

final product of the tailored patch pocket (seams internal)
Tailored shawl collar week 2
I must say that I am happier with the outcome of this toile in comparison to last week’s exercises’.
(Probably because there are no square corners and so many seams that intersect into the one position. Or maybe my sewing is improving?)
Also I like the outcome of the collar, I like how it looks more fluid than the notched lapel as the corners are very sharp and defined
From week 1 variation toile I liked how the collar is large and covers more of the bodice so I made the shawl collar bigger.
The collar stand I made 3cm (line d-e) and the length of the collar from the stand (how much you see of the collar at the back) I made 7cm (line d-f). 
I like how the collar sits away from the body shown in this view
So what I did forget to do on this toile/patterns was to prove the seams at the armhole. Because the front and back panels are joined and have that sight
curve when the seams are pressed open the seam allowance was either to short or too long like this.
Curved hem- I thought the curved hem was going to be a pain to sew but wasn’t that bad. With weeks one toile’s Libby told me to do a secure stitch when
doing square corners so I did this and it worked well.
Starting off with what is tailoring?
Looking up the dictionary meaning of tailoring
“the term refers to a set of specific hand and machine sewing and pressing techniques that are unique to the construction of traditional jackets.” (http://en.wikipedia.org/wiki/Tailor)
Originally my perception of a tailored jacket was something like a men’s suit jacket, so refined and simplistic in design, however my idea of a tailored jacket is starting to change.
Looking further into the construction and detailing of how the jacket is made, with layering inside and the great amount of hand techniques used has allowed me to grasp the idea of what tailoring is about.
it is definitely about how well the garment is put together, the skill of pattern making and definitely the patience of doing fiddly hand stitches and tacking. But also how can a tailored jacket be so unique and creative? is it within the use of pockets? Things like proportion and scale of collars etc.
I still don’t know where to take off, with a men’s or women’s jacket, nor do I know what road I will take in terms of theme and audience. But I think there is going to be an element of casual yet a sporting vibe but as I said nothing set in concrete.
getting straight into toiling and jumping onto a straight sewer was good but I guess i should have done a bit of practice before sewing the toile’s.
notched collar toile 1
the first toile i used all the same measurements on the sheet, but the only thing that would vary from others is the shape and design of the lapel. the collar part of the under and top collar is rather the same length and the v shape is small. notched collar toile 2 variation
i didnt play a whole lot with making it creative, but what i did alter was lowering the neckline at the front and back on the block (the collar should sit further away from the neck than the other toile does on a bigger maniquin) this allowed me to lower the break line which means there is less room for buttons.
you can see the differance between how it sits

i played with rounding edgeds which gives it a totally different approach. however the round edge on the collar look too much like a love heart shape especially if the garment was mirrored
also playing with the proportion of the lapel here the lower part of the collar almost entirely covers the breast and isnt far off the side seam which has a tendancy to kind of hang/flop there.

Saturday, August 22, 2009
Subscribe to:
Posts (Atom)